
Your first month-end close in DigiConta
Your first close in DigiConta? In this walkthrough you close a full month, from the CFDIs to the closed period. Each step tells you where it is in the menu and links to the guide with the detail.
Before you start
Section titled “Before you start”Closing a month blocks entering, changing or deleting anything dated in that month. DigiConta does not check for you that the month is complete: that is what you do in steps 2 to 5.
The walkthrough
Section titled “The walkthrough”-
Pick the company and the month. At the top left, in the top bar, pick the company. Next to it, in Período de trabajo (Working period), pick the month you are going to close: whatever you enter takes a date in that month by default.
-
Bring in the month’s CFDIs. Open Integraciones Fiscales → SAT México and tap Sincronizar Ahora (Sync now): DigiConta brings the CFDIs from the last 30 days (and does it on its own every 6 hours). In General → CFDIs, filter the Sin procesar (Not processed) ones and review them.
→ Detail: Load supplier CFDIs
-
Post the CFDIs. In the Contabilidad → Contabilización de CFDIs tab (Accounting → CFDI posting), pick the year and the month and tap Contabilizar periodo (Post period). Review the ones left as No contabilizado (Not posted): the reason appears when you hover over their status.
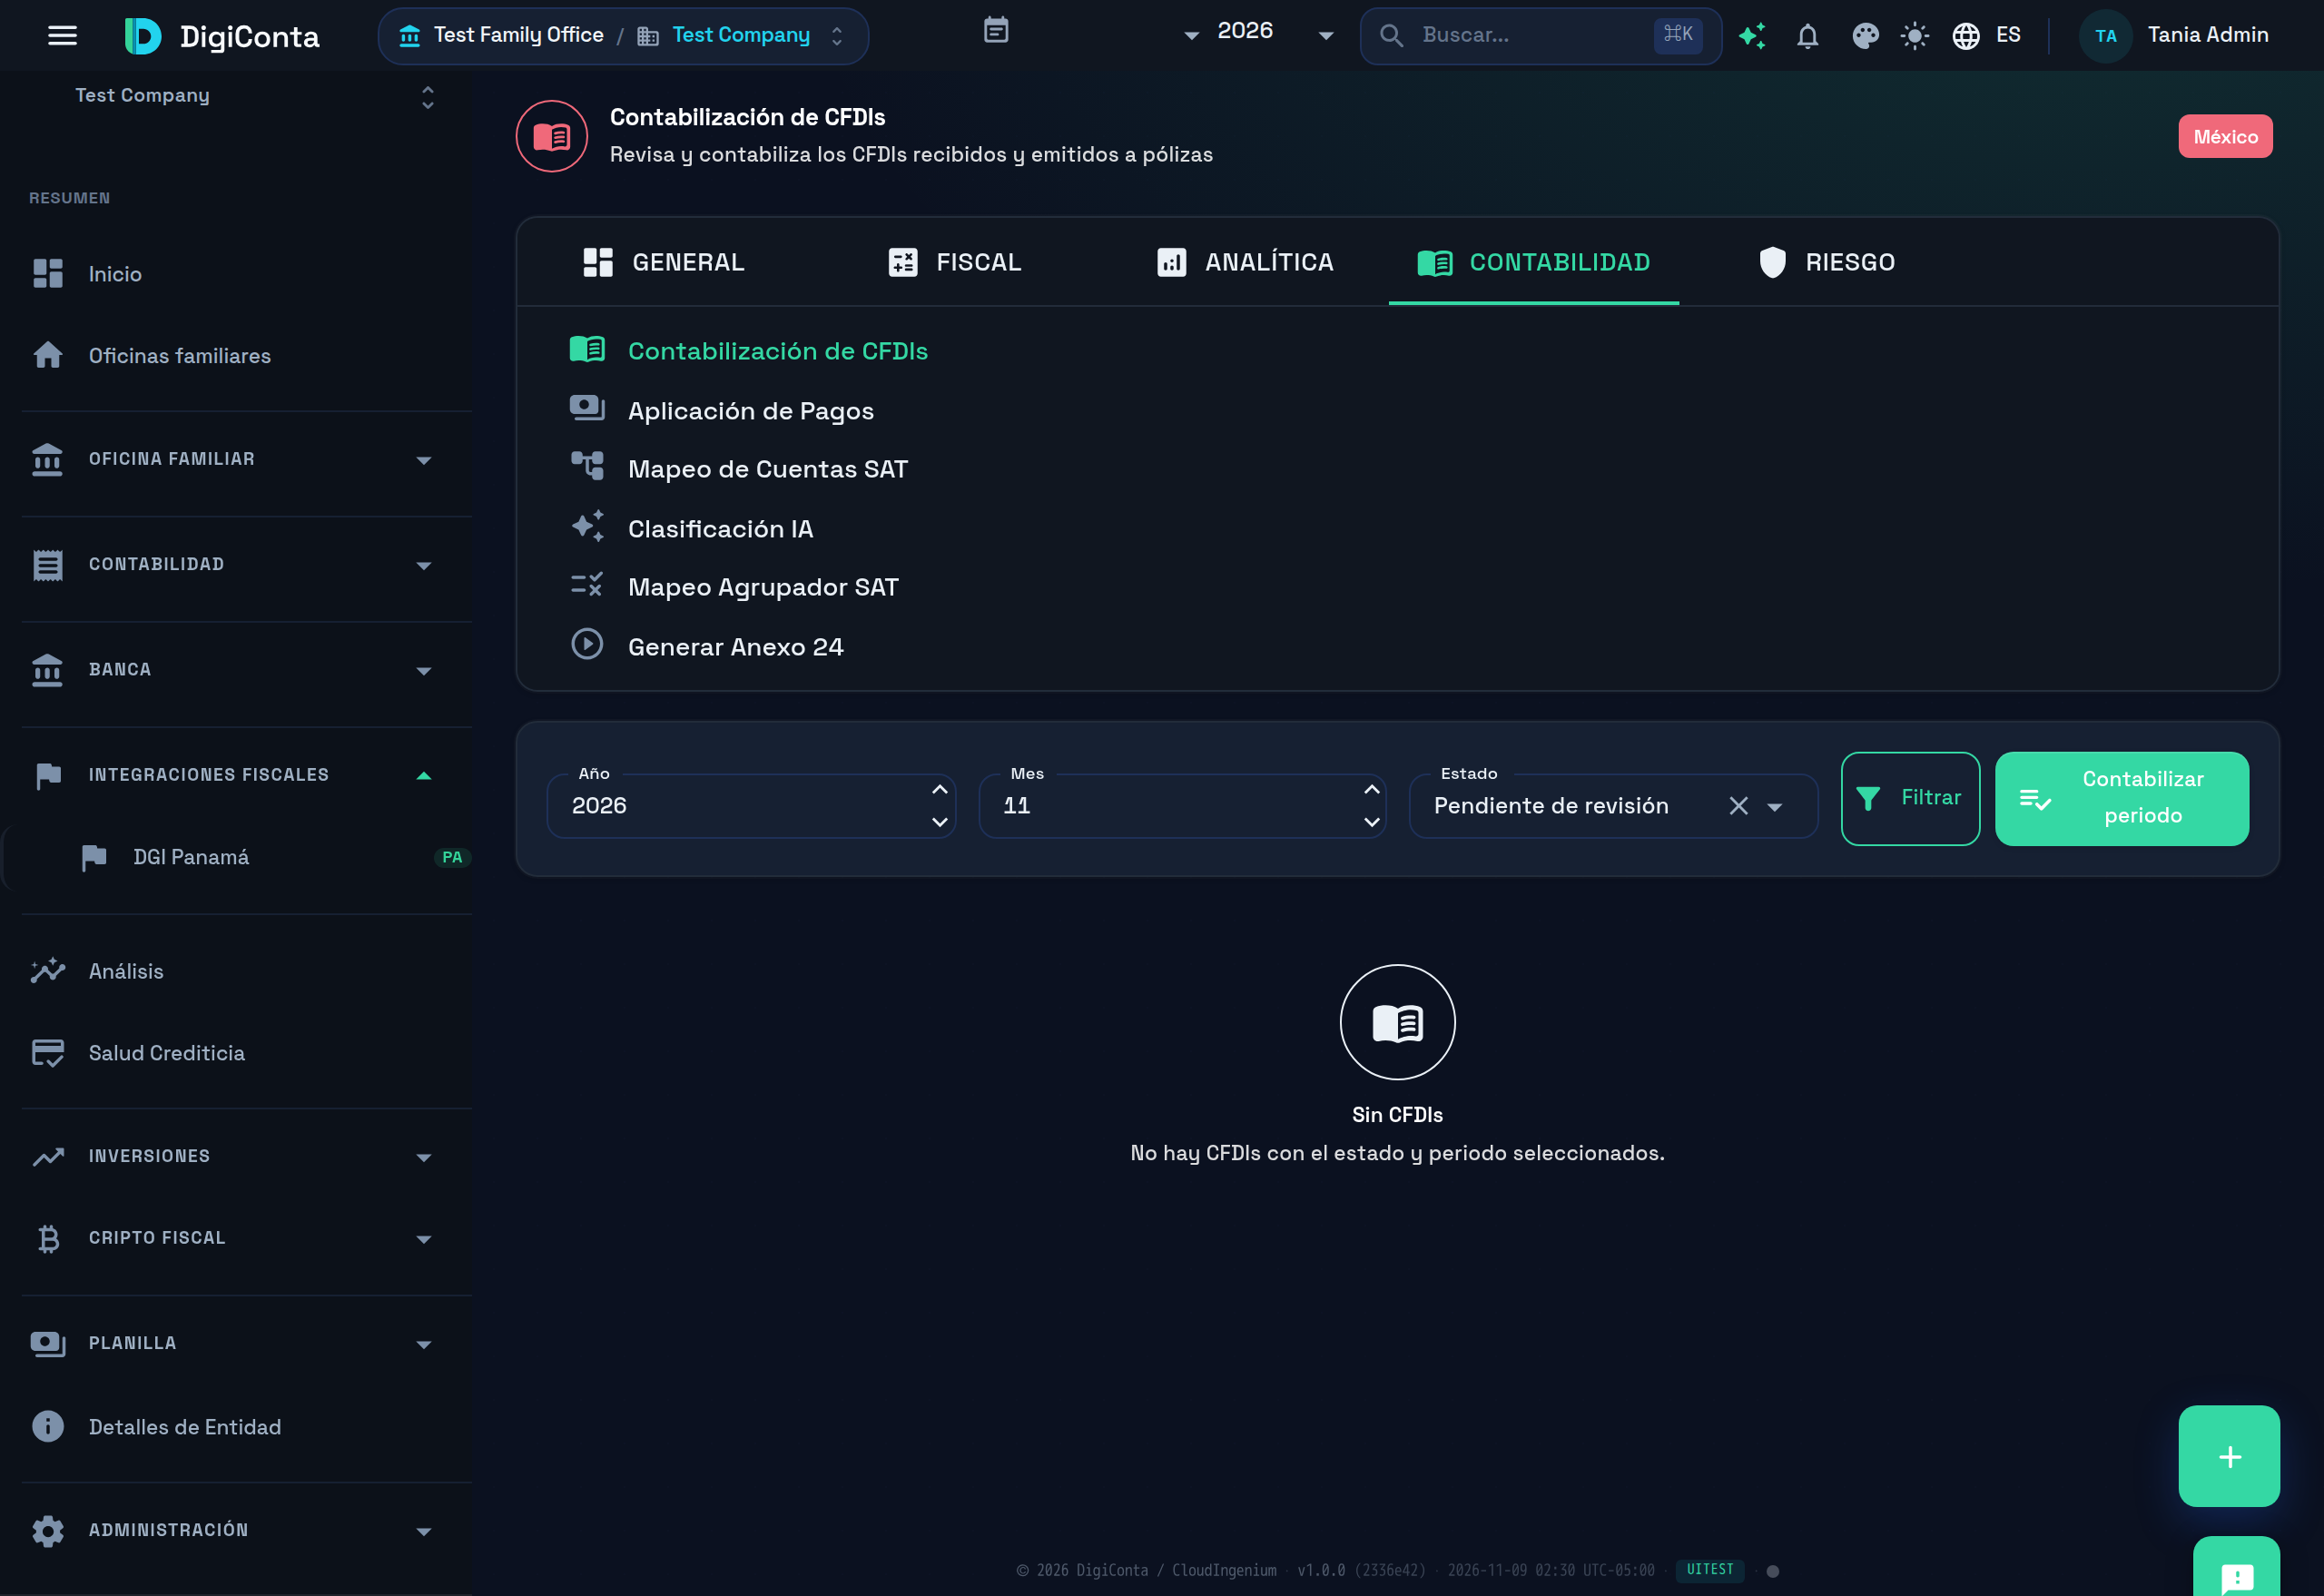
Contabilizar periodo posts all the pending CFDIs of the month you picked at once. → Detail: Posting CFDIs to journal entries
-
Reconcile the bank. In Banca → Estados de Cuenta (Banking → Bank statements), tap Importar Estado de Cuenta (Import bank statement) and upload the month’s statement. Then, in Banca → Conciliación (Banking → Reconciliation), match each transaction with what you recorded.
→ Detail: Upload bank statements · Bank reconciliation
-
Review the reports. In Contabilidad → Reportes Financieros (Accounting → Financial reports), pick Personalizado (Custom) and the month’s range. Generate the Estado de Resultados (Income statement) and the Balanza de Comprobación (Trial balance), and check that the trial balance says it is balanced.
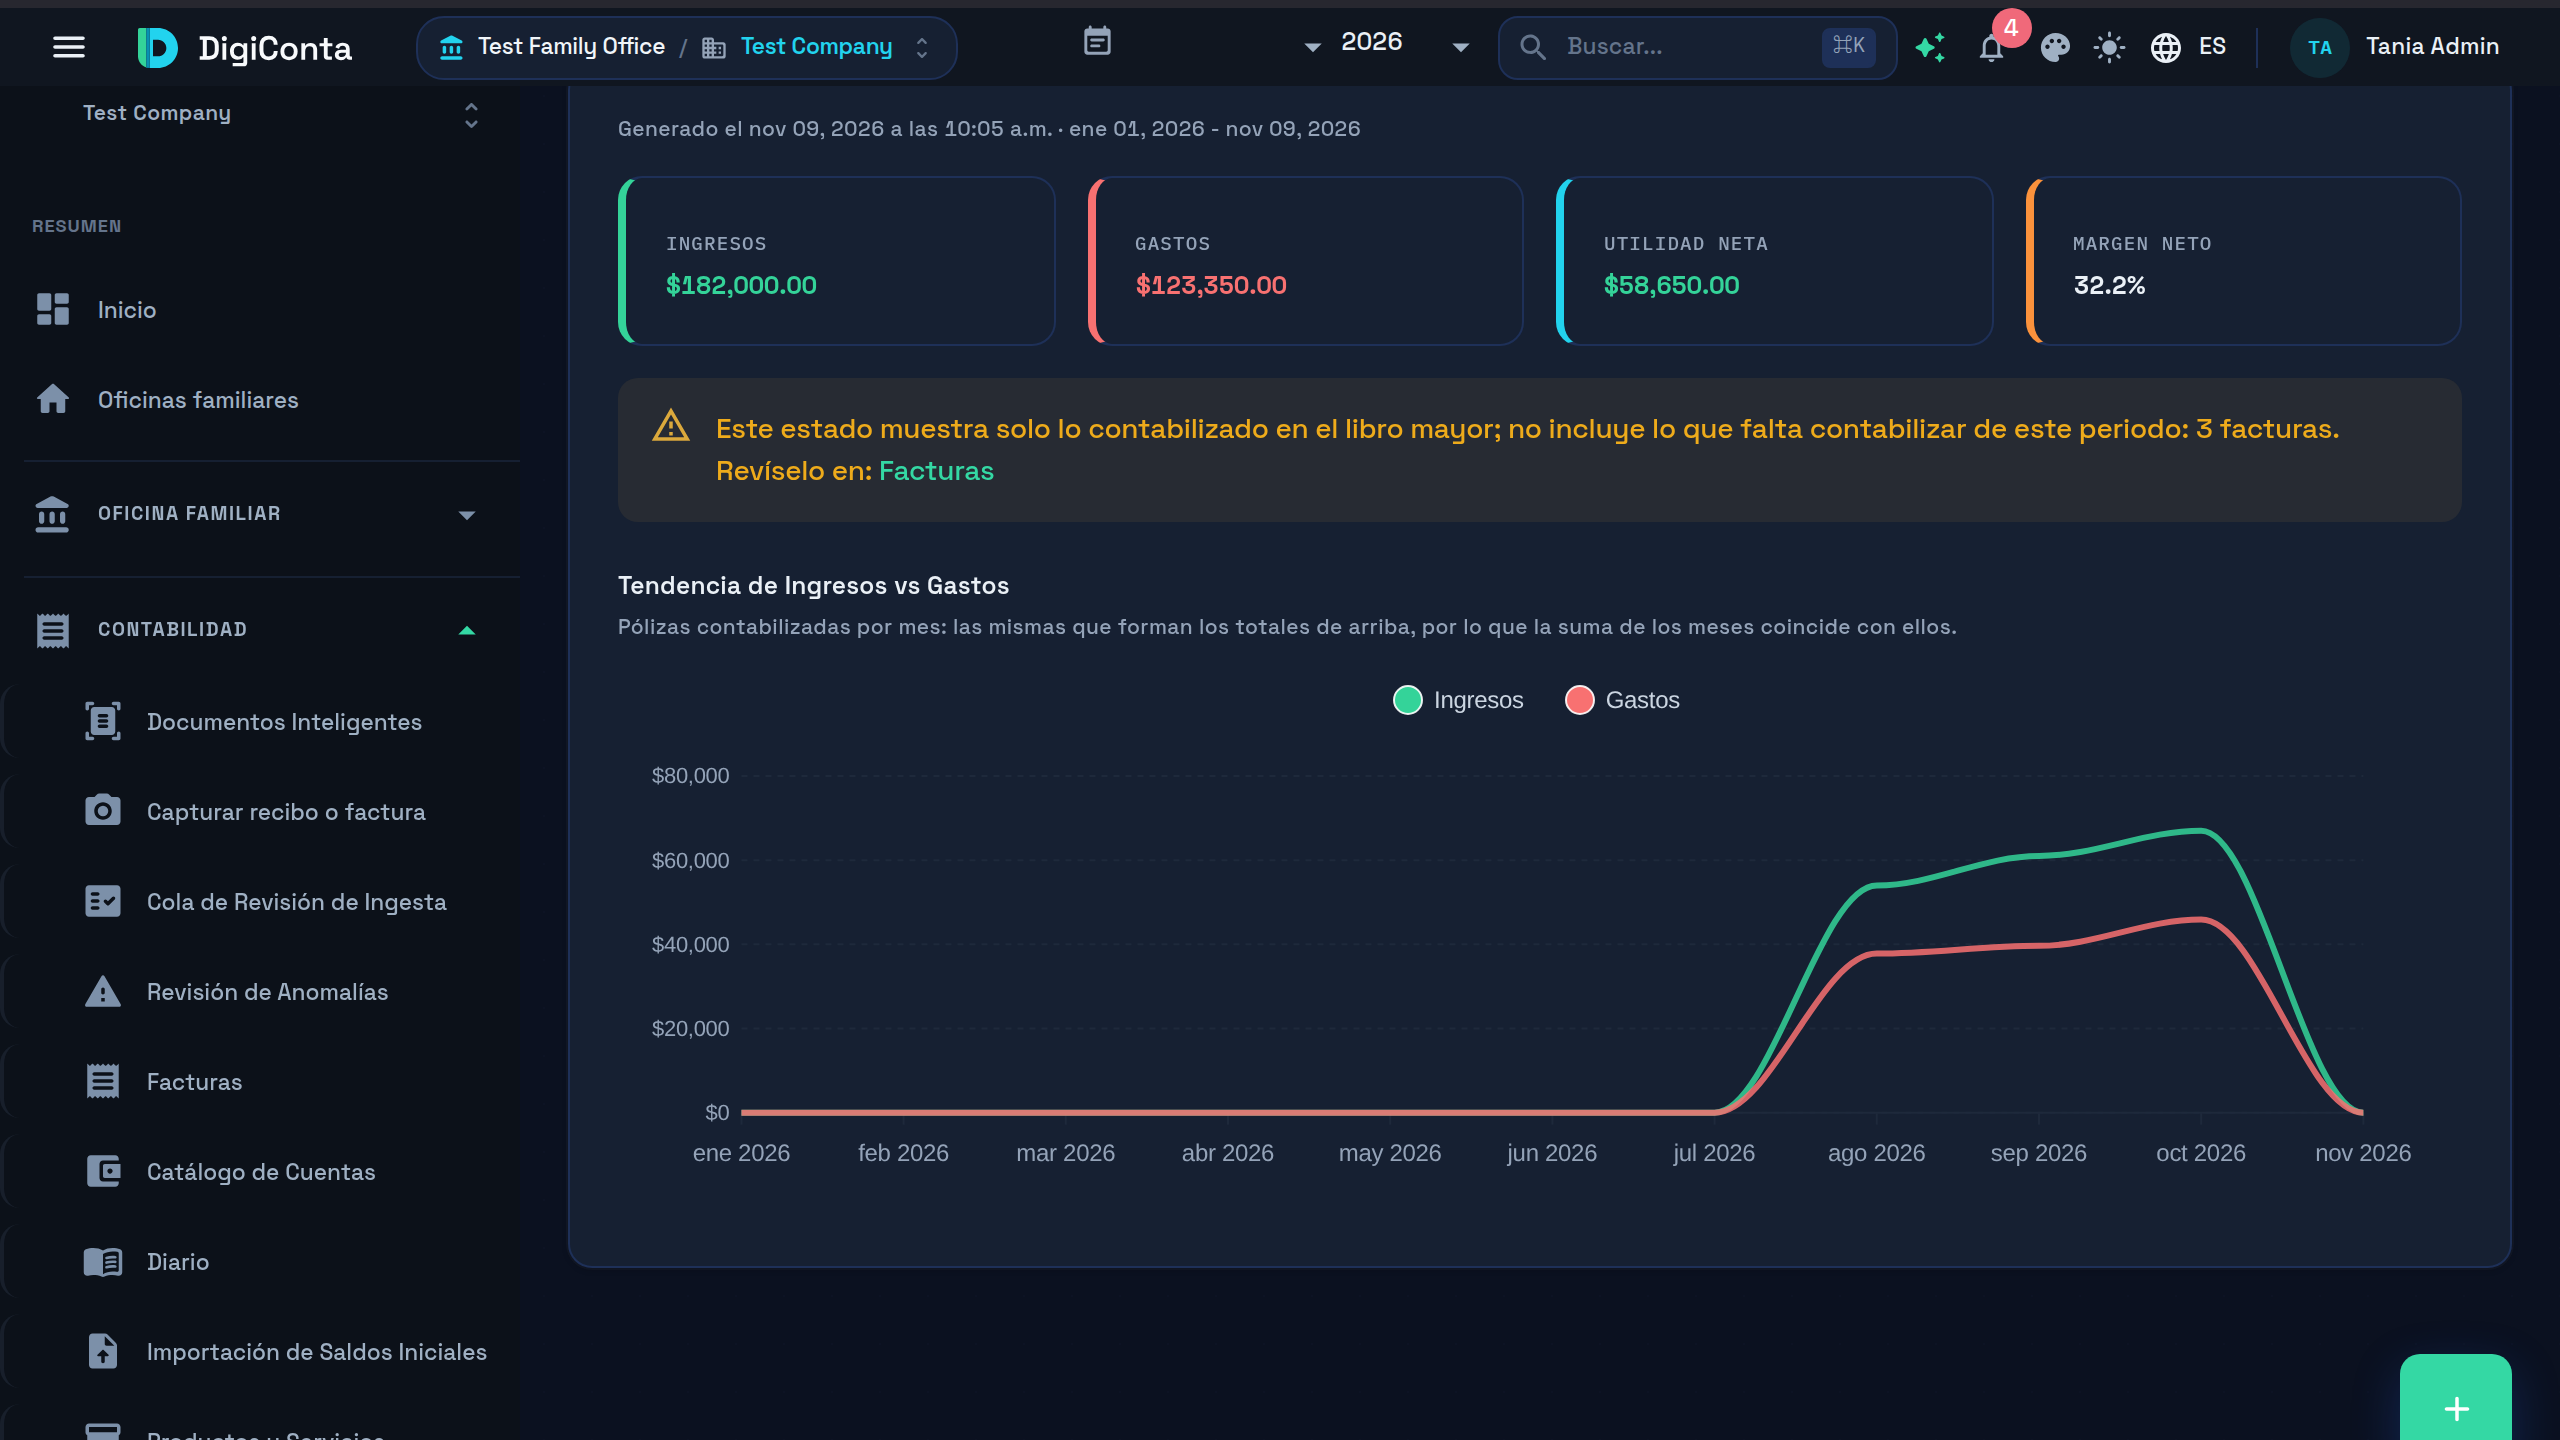
If you see the yellow notice, there are invoices or reimbursement requests not posted yet: post them before you close. The chart adds up the same as the indicators, month by month. → Detail: Financial reports
-
Close the period. In Contabilidad → Períodos Fiscales (Accounting → Fiscal periods), find the month’s period; if it does not exist, create it with Nuevo Período Fiscal (New fiscal period), of type Mensual (Monthly). Tap Vista previa (Preview) to see the month’s income, expenses and profit, and then Cerrar Período (Close period) and Confirmar Cierre (Confirm close). You see «Período fiscal cerrado exitosamente» (Fiscal period closed successfully).
→ Detail: Fiscal periods
What the close does not do
Section titled “What the close does not do”- It does not generate the SAT XML files. The electronic accounting trial balance and chart of accounts are generated in Integraciones Fiscales → SAT México, tab Contabilidad → Generar Anexo 24: Generate electronic accounting.
- It does not prepare the DIOT: Monthly DIOT.
- It does not post journal entries. Closing a month only freezes it; the closing entries are posted once a year, when you close the Anual (Annual) period: The year-end close.
What’s next?
Section titled “What’s next?”Once you have the close down, these guides go deeper:
See also
Section titled “See also”- Getting started in DigiConta: sign-in, the Today view and the search.
- SAT bulk download: how the CFDIs reach DigiConta.
- Your first tax month: the SAT review in DigiConta.
- Common problems and frequently asked questions: quick fixes.
- DigiConta overview: all the guides.